HOW TO TIPS
- We suggest that you consider uploading your images to a Microsoft Powerpoint presentation in Landscape Format.
- The Standard format size is 600 x 420 / 200 x 140 - when enlarged the image will show at the size it was loaded.
- Powerpoint will allow you to easily add picture frames and to add captions to the slides.
- Next export the presentation in .png format.
- Open the exported folder and upload the .png images above.
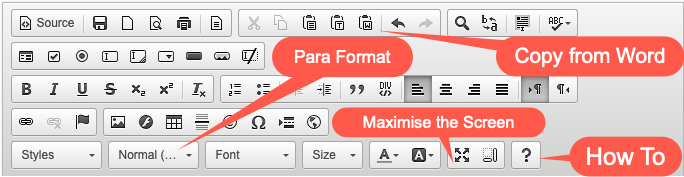
The CK WISIWIG Description Editor PICTURED ABOVE AND BELOW offers a wide range of possibilities for adding text images and video content.
- Many use the Para Format option Normal (DIV) - If you copy from Microsoft Word be sure to select the "Copy from Word" option.
- Selecting Source will allow those that are up to coding to do so but it is only an option. - hover on any button and it will tell you what it does.
Enter your content here:
Contact details
Links to Facebook etc
Links to Youtube etc
IF YOU PREFER YOU CAN REQUEST US TO BUILD YOUR SHOWCASE FOR YOU AS WELL AS YOUR ABOUT US BUSINESS LISTING.
Powerpoint & Word Image Frames
Some will use Photoshop, Canva, Paint, and maybe a free App like Vista Create to style their product image uploads. I think that many will have access to Microsoft Word or Powerpoint, and to this end have added some Powerpoint templates below. Each has a single image on the standard Powerpoint background. Place your pictures, sized to fit over the frame image "boxes," and when done, move the frame to the front layer. Your pictures will now be framed. Add text captions onto the frames and then save them as .jpg images.
KnifeMakers Frames. Click here to download.
Handymanproteam Frames. Click here to download.
Leathercraft Frames. Click here to download.
Click here to download. Pink & Teal Frames.
Black & Gold Frames. Click here to download.
Red & Blue Frames. Click here to download.
Turbine Frames. Click here to download.
| 


